Happy 4th my friends!
If you have been scrolling through social media this morning, you have probably seen A LOT of images with people who have sales in their shops, doing a 4th giveaway, some type of celebration, or other holiday image.
While there are many different ways you can create an image for social media… I wanted to share the way that works best for me.
You know… the picture that fits PERFECTLY into that little square image of your social media home. The picture that you don’t have to re-size or shrink or expand to make it all fit. Yep…. that social media image!
I’ll be doing a weekly series (will *try* to be every week) of “Tech Tips with Travis” which will include SIMPLE but hopefully some HELPFUL little tech tips that you can use yourself!
Today….
Now there are ways that you can create these images on your phone…. but for me, I create them on my home PC/laptop because that is where I have all of my clipart and fonts that I can use to create an image!
STEP 1:
You will need PowerPoint. Yep… that simple little program is what I create EVERYTHING in…
Open PowerPoint and you are going to need to re-size your slide. This is easy… simply click on the “design” tab. Locate “slide size” and you will have options as standard, widescreen, or CUSTOMIZE. Click on customize!
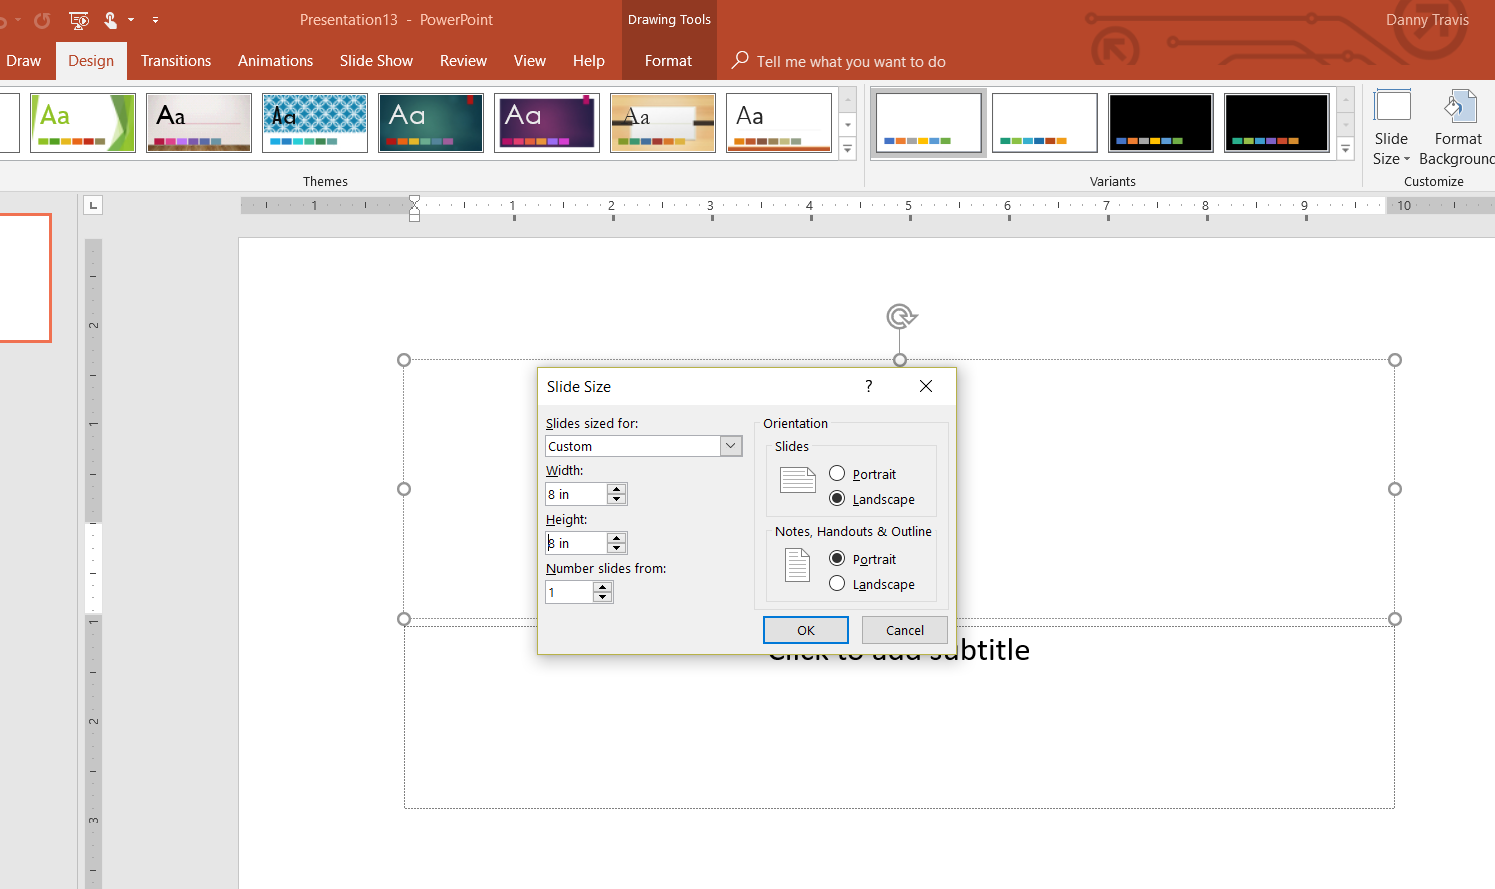
You will see this little box pop up! You will need to go in and manually change the width and height to 8 INCHES. This will create the perfect social media square!
** For those of you that create on Teachers Pay Teachers and you see teachers with the perfect square covers to showcase their product… this is the size for that too! **
After re-sizing your slide to 8 x 8. Click OK. You may be prompted with another sizing screen…. CLICK ON MAXIMIZE.
STEP 2:
Now is the FUN part! You get to create whatever image you want! Some people still use the text box feature… but it drives me completely INSANE. soooooo… I use the “insert shape” feature when I put text onto my slides.
Click on “insert shape” and I usually choose the rectangle. (it’s just simple!)
Place the shape on the screen where you wish… and type. *If for some reason it won’t let you type – RIGHT CLICK and click “edit text”.
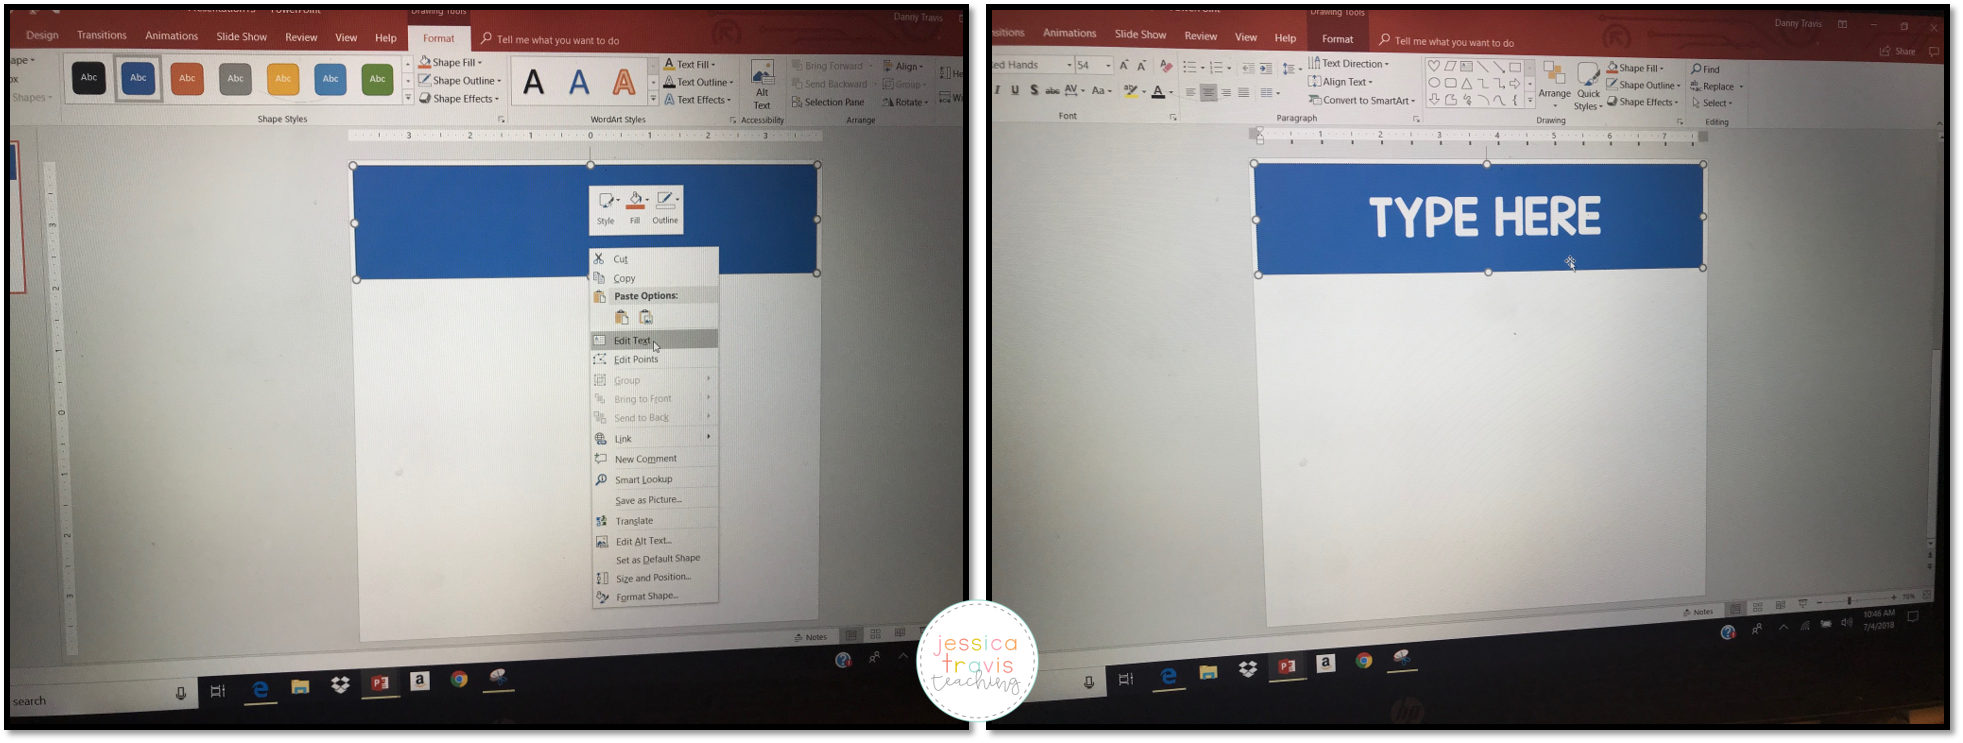
Your text will appear WHITE. Simply highlight the text and change the color to what you wish. (I wrote “type here” as an example – your screen will still appear blank until you type in the shape box.)
While the blue filled box is a pretty shade of BLAH …. I want JUST the text to appear with no background color! Sooooo…. I change my font to black and then I need to get the shape transparent!
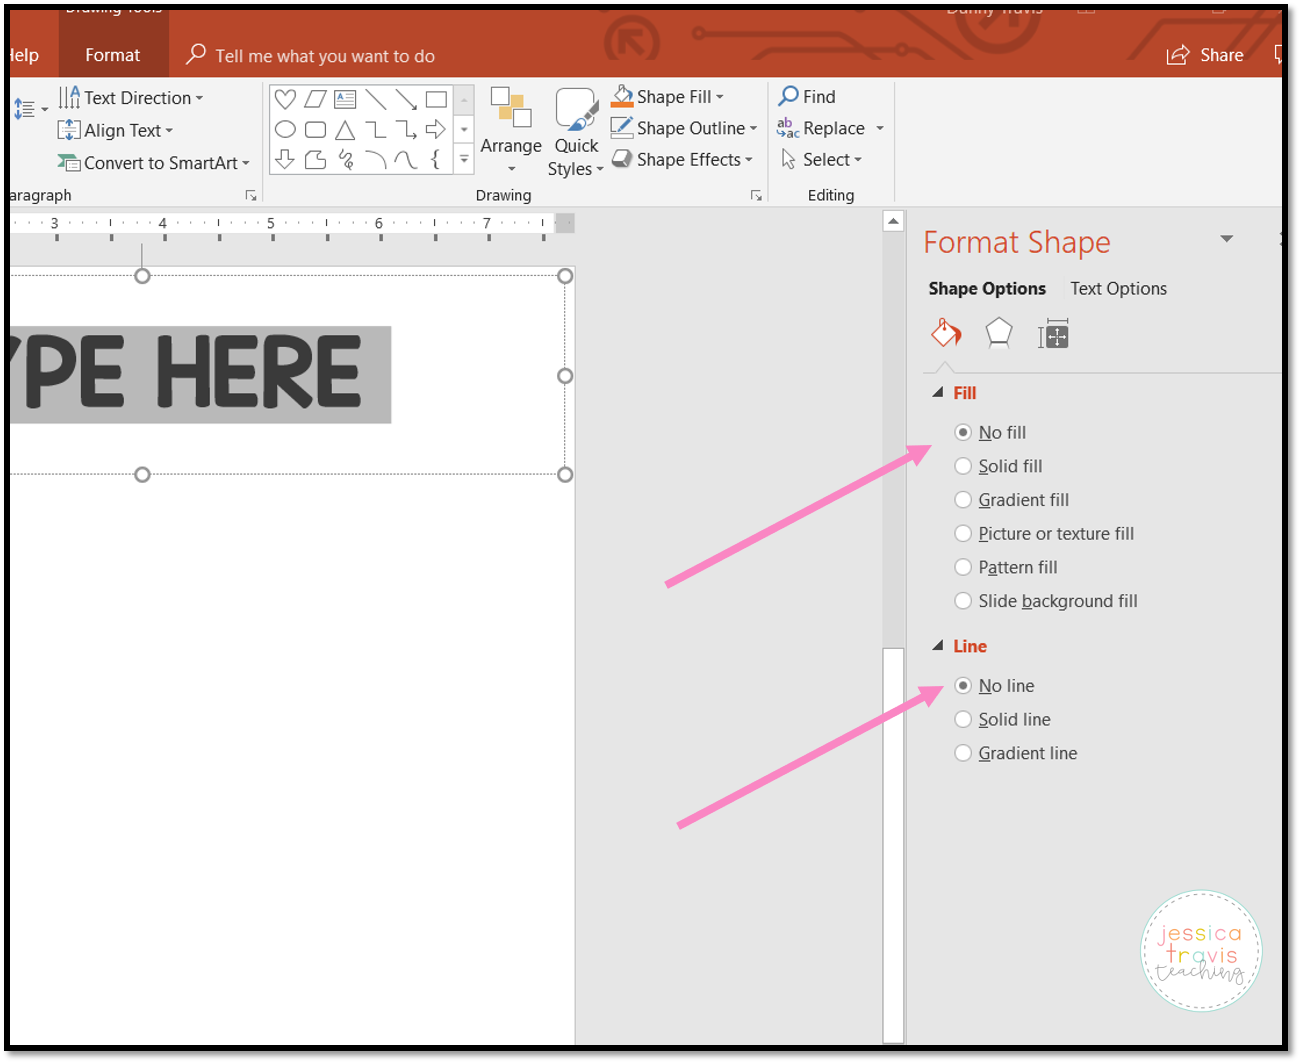
To do this: RIGHT CLICK on your shape with text. Click on “FORMAT SHAPE”. You will need to click on “NO FILL” under the fill section and “NO LINE” under the line section. Then click OK or APPLY.
*** You will want text in your shape box BEFORE making it transparent – many PowerPoint programs will delete the box if you do it prior to entering text***
STEP 3:
Design away!
You can easily move the shape of text where you need it. *** To create another text shape box – DO NOT go through all of those steps again. Simply click on the shape box, copy and paste! WA-LA. You now have a new box with text to move where you please on your 8×8 perfect slide.
You can insert clipart, pictures, or continue with the text that you need.
Simply click on”INSERT” – Picture. Select a file from where you have saved an image.
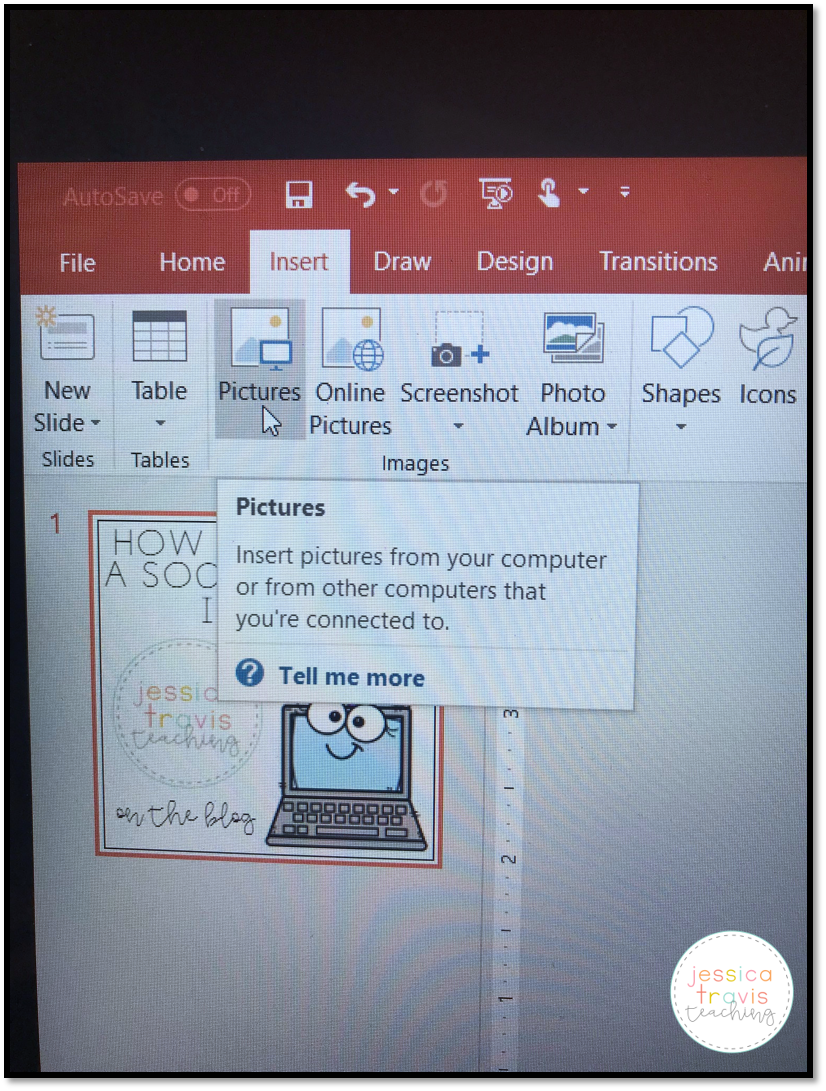
BUT…. then your picture is all WONKY and on top of other pictures and images… something like THIS:
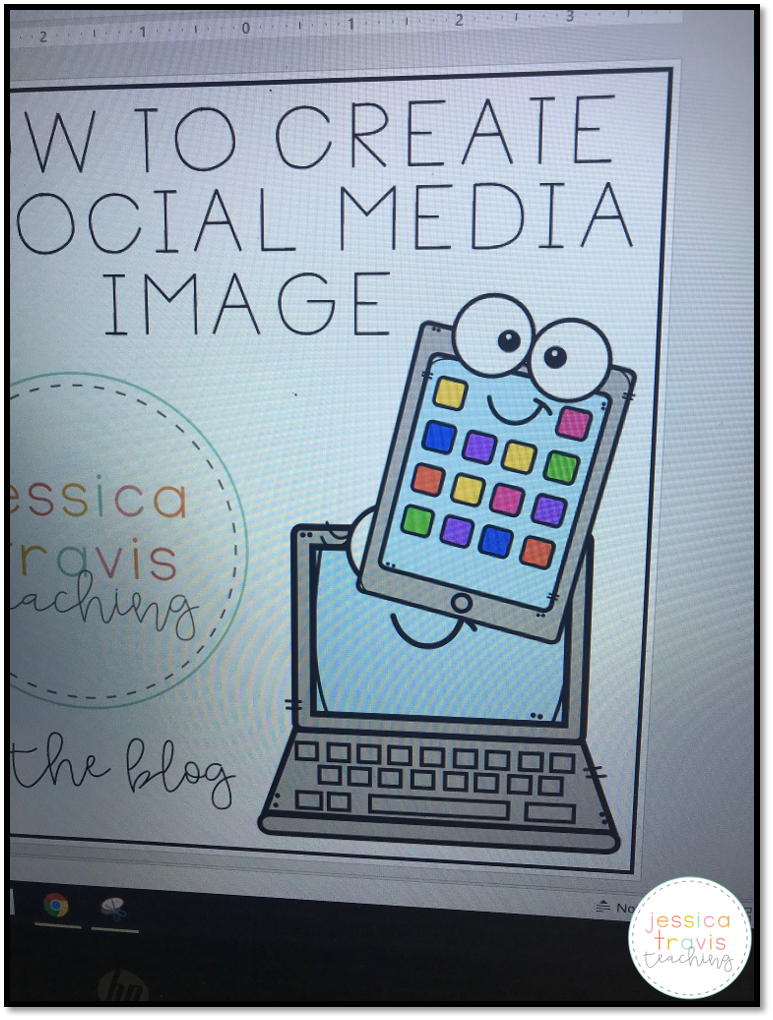
DON’T WORRY…. this is a SIMPLE fix!
Click on the image you want to move backwards or forwards…. in this case, I am clicking on the little iPad to move BEHIND the computer image.
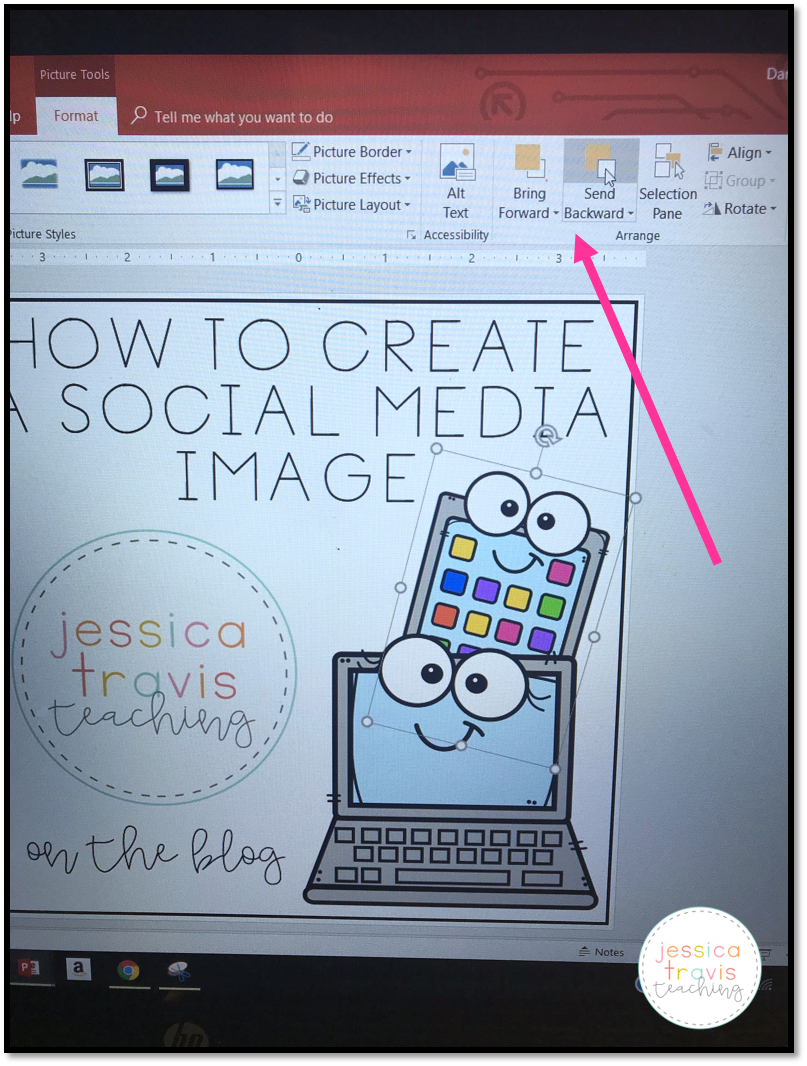
Click on “FORMAT” – ** the “format” option will not be shown unless you have clicked on an image or box with text **
You will see two options that say MOVE FORWARD or SEND BACKWARD. In this case, I want the iPad image to be SENT BACKWARD behind the computer image. Click on the choice you want (you may have to click multiple times depending on the order in which you inserted the images!)
Then… WA LA… you have an image!
STEP 4: saving your image
To SAVE this image for you to use in social media…. there are TWO ways you can do this.
You can hit CTRL + A – this will highlight EVERYTHING on your slide. After hitting CTRL + A (at the same time) – then RIGHT CLICK. You will find “SAVE AS PICTURE” and click on that. This will bring up your tab that will allow you to save this image where needed (on your desktop, flash drive, etc…)
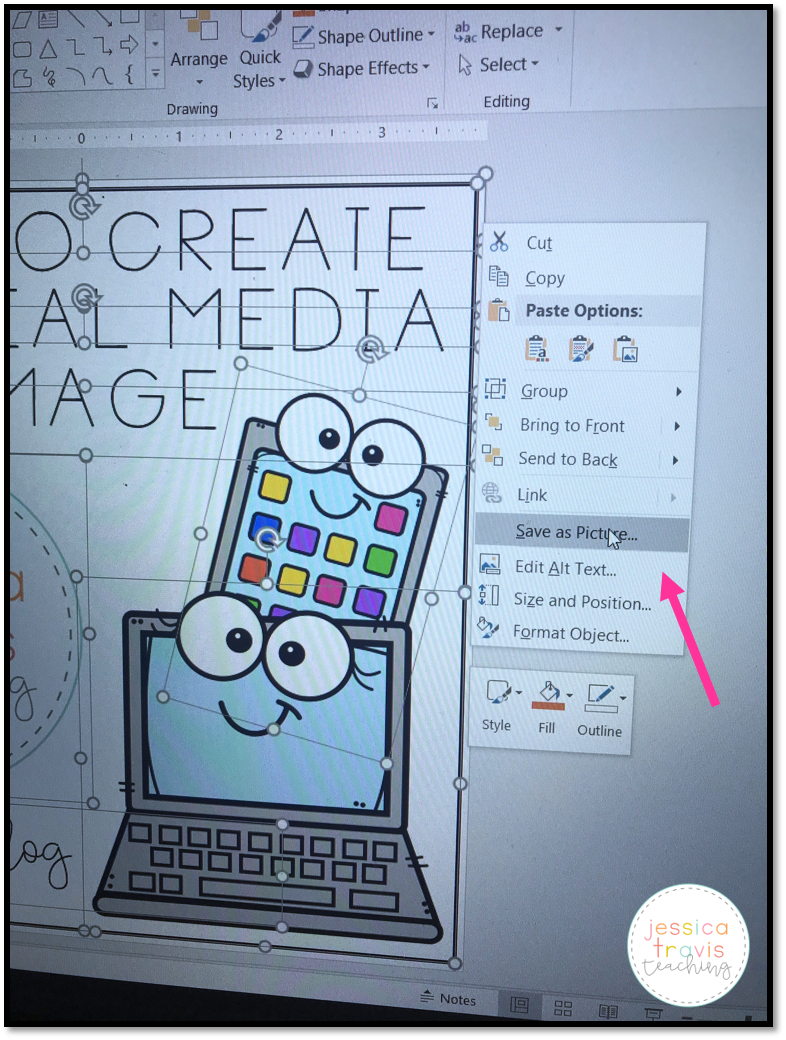
Option 2 to save your image –
Find your SNIPPING TOOL. (use your start or search bar and type in “snipping tool”). It will bring up a little box – click on NEW.
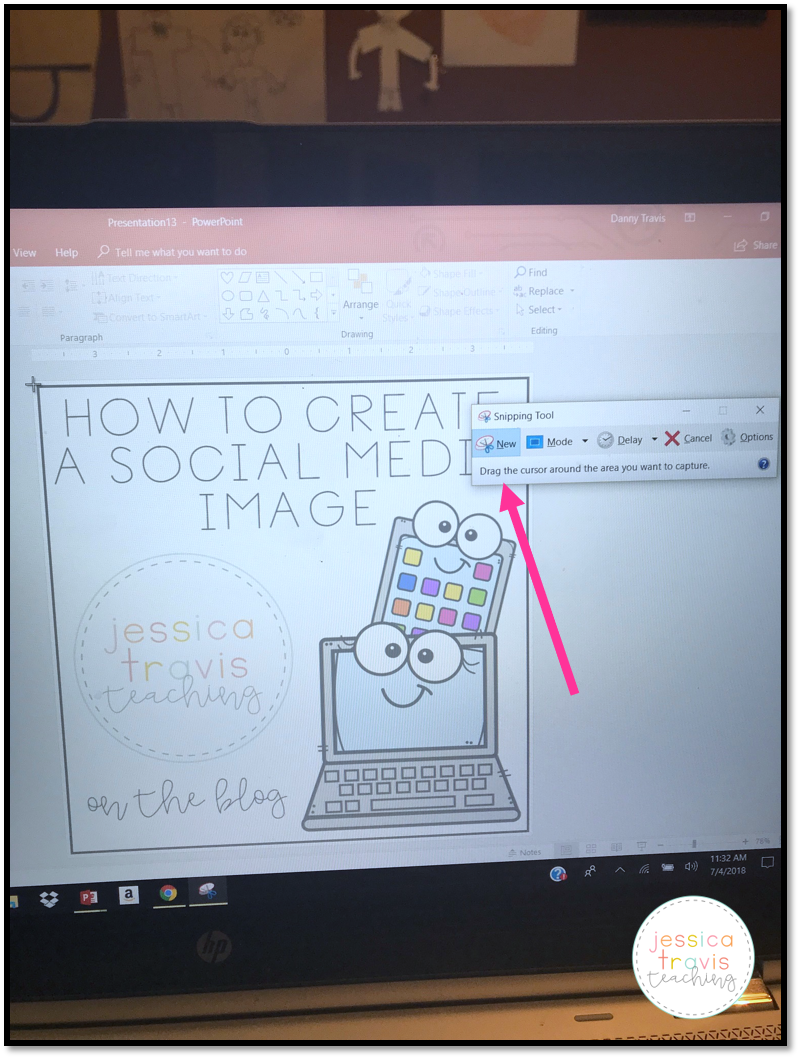
Using your mouse, you will click where to start and hold down to drag around the entire image. Once you have snipped it the way you want to save it… it comes up in a box that will allow you to “Save” or re-do by clicking “NEW” again.
Once you have it saved…. you can email yourself the picture so that you have it for easy access on your phone (if that is how you insert images to your social media most often!) or you can simply insert it from your computer! If you choose to email it… simply open up your email and “Screenshot” the image. Don’t worry…. it will still fit perfectly into your social media box (on Instagram) or simply edit if using Facebook from your phone!
When you insert it… it will be the PERFECT image 🙂

While this may seem like A LOT of steps… have no fear! Once you play around with it a few times and insert your text shapes and images to create your design… it will come easy! Feel free to ask any questions…. but I promise after you play around with it for awhile… you’ll be a PRO!
Stay tuned for more TECH TIPS WITH TRAVIS!


Love love love that you are sharing your genius with others!! The smartest person in the room
IS the room, and you make our room SO much better, JT!!!
Happy 4th to you too! Thanks for the lesson. Can’t wait to try it!
Thanks for this! I’ve been playing around in PowerPoint, but was having trouble with text boxes so this is super helpful!
You are welcome! The text boxes ALWAYS gave me issues…. shape boxes do the same job with less stress!!
Thank you so much for this. I have been craving starting out on making my social posts and I’ve been looking for tutorials. Amazing and helpful.
How did you add the border around the edge?
I just inserted a “shape” (square). I selected NO FILL and BLACK LINE. I re-sized it to fit the outside of my 8 x 8 slide size!